READY TO SETUP YOUR TOTAL.EMAIL Account?
Here is a quick guide to help you set up your existing email address to your favorite email client on desktop, tablet or smartphone.
This guide will set them up as an IMAP account.
IMAP is recommended rather than POP, because it’s a protocol made to support several devices accessing one same account, with all folders synced on our server, which also guarantees that our backups will be executed.
You can synchronize your mailbox through multiple devices, such as smartphones and tablets, using your favorite e-mail app. You can use any e-mail app available on your device, including the native email app.
To setup your email account as an IMAP account in a new email client, follow these steps to add the email account to your preferred email application on desktop, smartphone or tablet (Outlook, Apple Mail, Thunderbird, Android Mail, etc.).
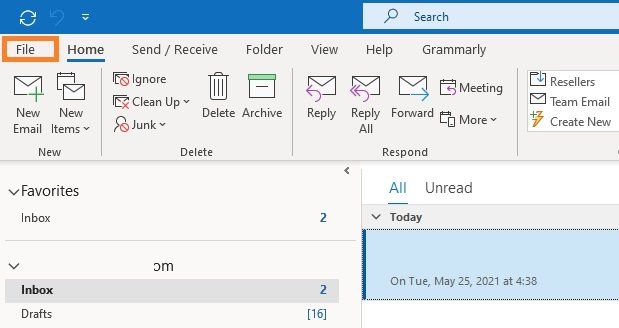
STEP 1: OPEN THE EMAIL CLIENT AND ADD A NEW EMAIL ACCOUNT
IMAP is recommended rather than POP, because it’s a protocol made to support several devices accessing one same account, with all folders synced on our server, which also guarantees that our backups will be executed.
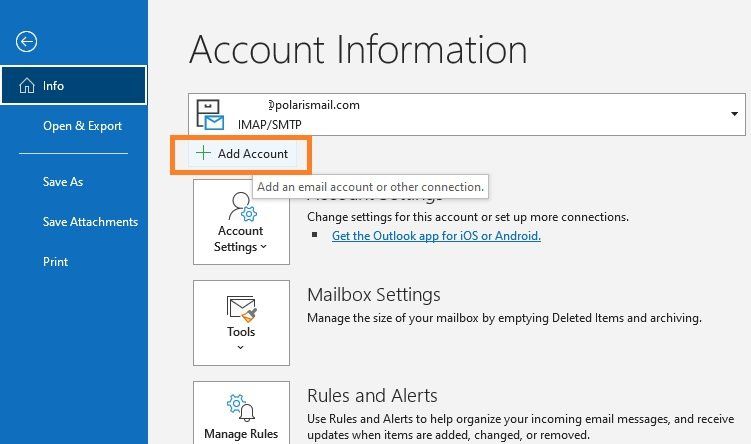
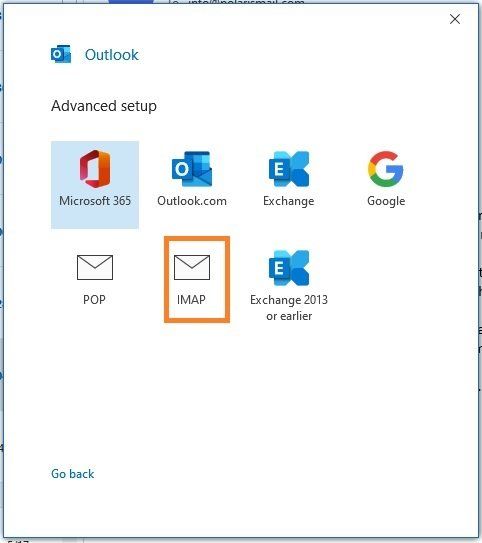
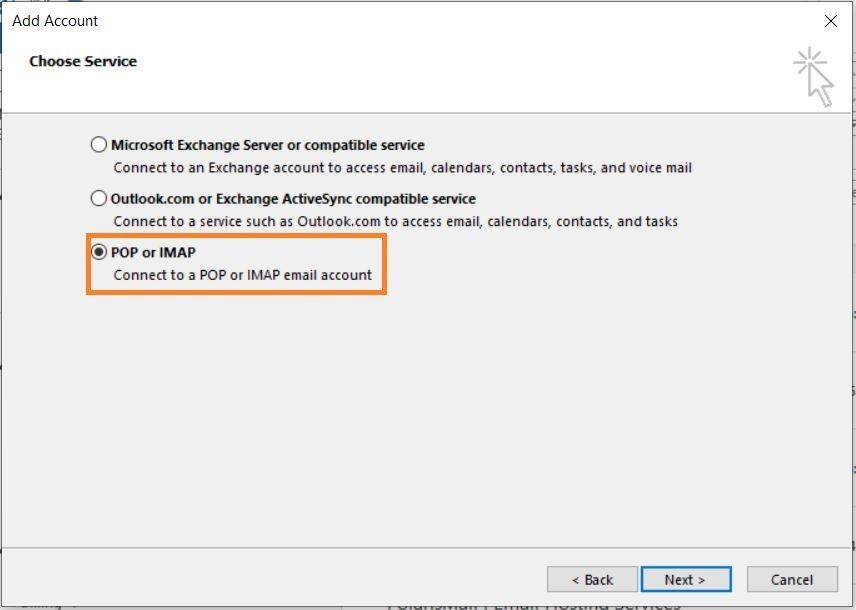
1. In your email application, click on the button Add account and select a new account of type IMAP.
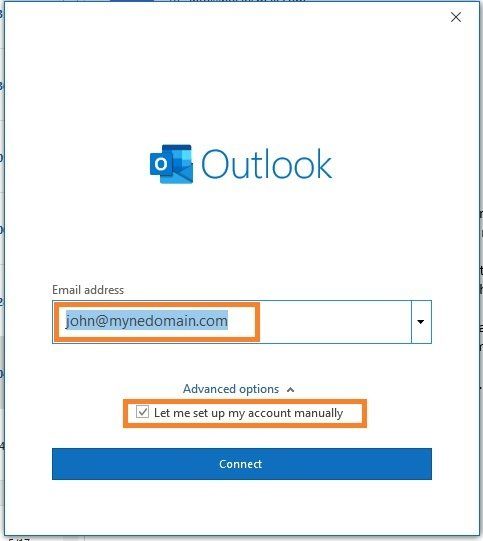
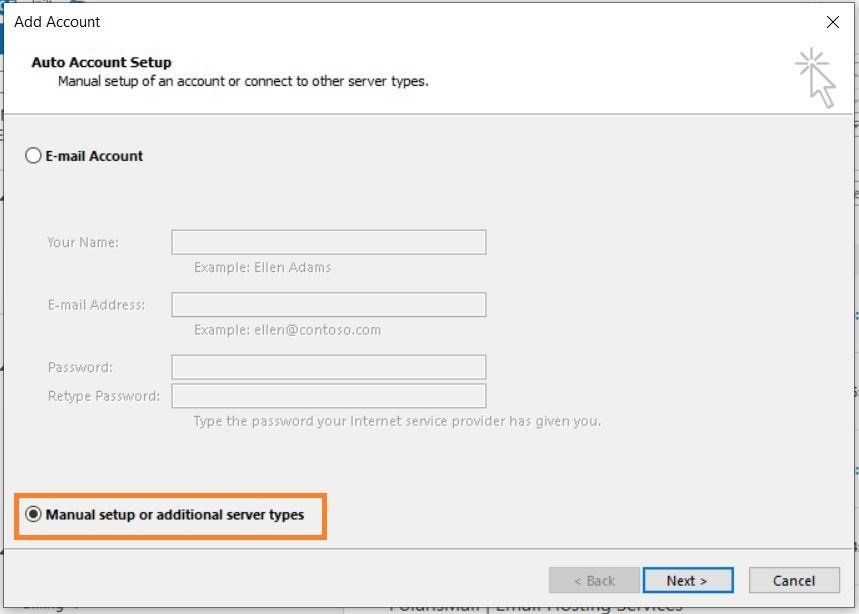
2. Select Manual Setup or Advanced Setup.
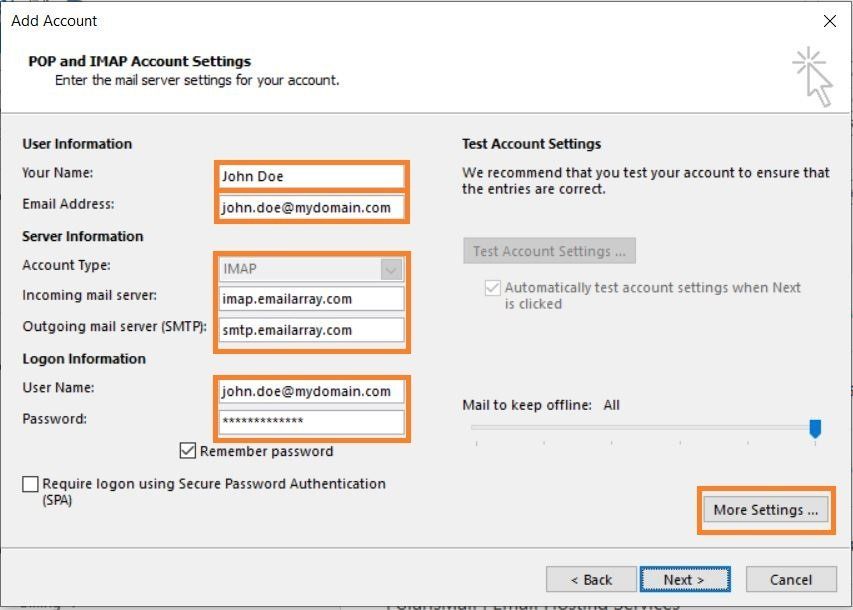
3. Fill in the server details for:
USER INFORMATION
Name: the name that will be displayed in emails as “From”. It can be your full name, the name of the Company, etc.
Email Address: your full email address, for example john.doe@yourcompany.net or john.doe@mydomain.com.
SERVER DETAILS
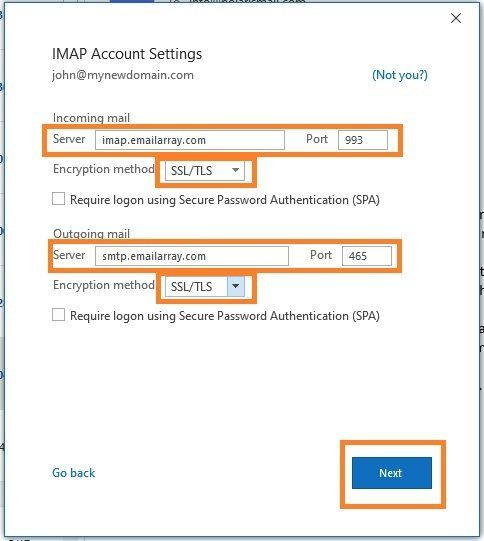
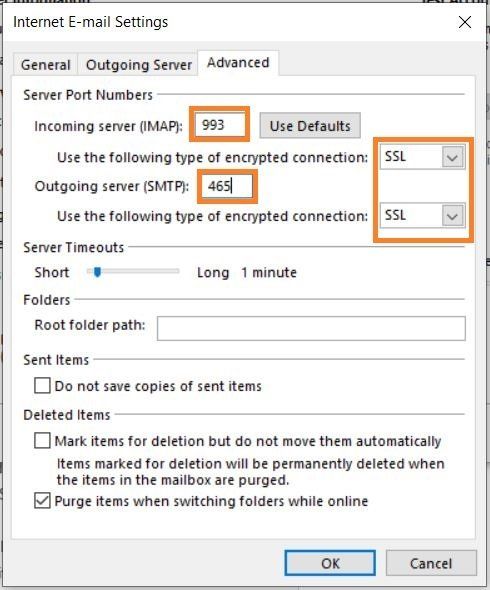
Incoming server: imap.emailarray.com
Incoming server port: 993
Incoming server type of encryption: SSL
Outgoing server: smtp.emailarray.com
Outgoing server port: 465
Outgoing server type of encryption: SSL
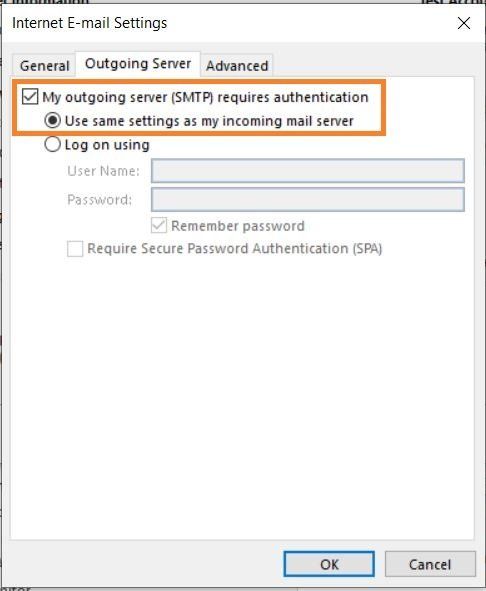
Check the option for SMTP requires authentication (sometimes referred to as “My server requires SMTP authentication”).
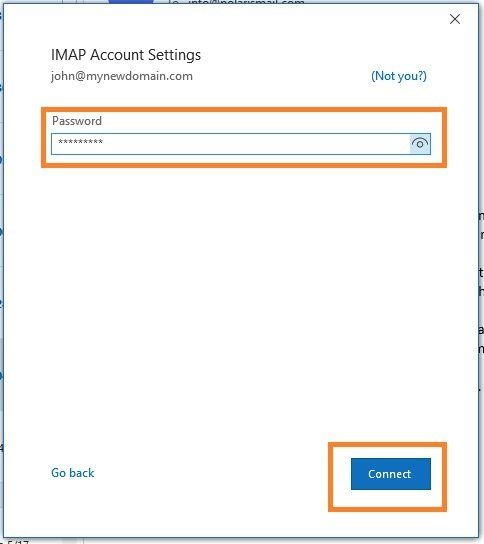
LOGIN INFORMATION
User Name / Email address / Username: your full email address
Password: your email address password
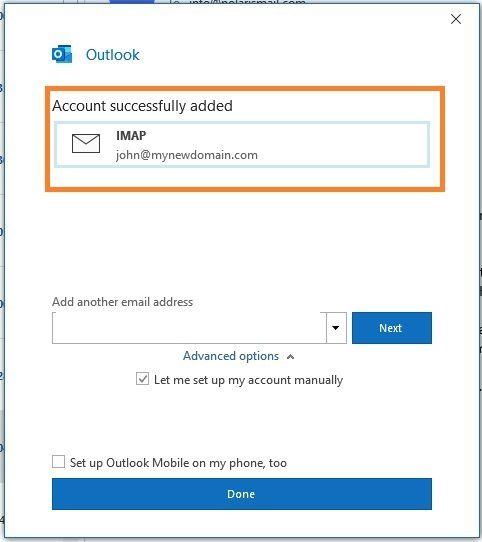
4. Click the Finish button to complete the set up
5. Send a test mail 🙂
Outlook 365 Configuration
Outlook 2013 Configuration
Apple IOS Configuration
Here's the step by step for setting up an IMAP account on iOS.
- Click on Settings
- Click on Mail, Contacts, Calendars
- Click on Add Account
- Click on Other
- Click on Add Mail Account
- Inform the following
- Name - The name you want on your outgoing email
- Email - Your full e-mail address
- Password - Your password
- Description - A description for your account
- Click on Next
- IMAP is selected by default
- Under Incoming Mail Server, enter as below:
- Host Name - imap.emailarray.com
- User Name - Your full e-mail address
- Password - Your password
- Under Outgoing Mail Server, enter as below:
- Host Name - smtp.emailarray.com
- User Name - Your full e-mail address
- Password - Your password
- Click on Next
- Click on Save
Android Configuration
Here's the step by step for setting up an IMAP account on Android's native mail app.
- Press the device's Menu button.
- Tap Settings.
- Click on Accounts
- Click on Add account.
- Click on Email.
- Enter your full e-mail address and password.
- Select if you want to send e-mails using this account by default
- Click on Next
- Click Manual setup.
- In account type, choose IMAP account.
- Android will automatically use imap.yourdomain.com and smtp.yourdomain.com as hosts, which is OK
- Username field has to be changed to your FULL e-mail address
- Click on Next 3 times in a row, note that on the last page you can setup specific details such as interval for checking mail
- On the last page, Android gives you the option to change the friendly name and also Your name, as it appears to recipients.
- Click on OK to finalize the procedure.
If you want to setup IMAP with SSL (recommended!), after clicking on Add account > Email and typing in your e-mail and password, fill out the hostnames as per below.
- IMAP server - imap.emailarray.com
- Security type - SSL or SSL/TLS
- Port 993
- SMTP Server - smtp.emailarray.com
- Security type - SSL or SSL/TLS
- Port - 465
Important Links
-
Link to WebmailList Item 1
Access your email account from any browser window.
-
User Control PanelList Item 2
This lets users manage several aspects, such as change their password, setup autoresponder, manage spam quarantine, forwarders, track deliveries, create delivery rules, manage white and blacklist and much more.
-
SupportList Item 3
Need Help with your email? Let us know...